How to get a wiki running under localhost on your (X)ubuntu computer.
- Wiki Overview
- Local Web server
- Installing on (X)ubuntu
- Install Apache
- Edit httpd.conf to reduce machine load
- Downloading Usemod wiki script
- Configuring the wiki.pl script
Wiki Overview
The most (in)famous wiki is the Wikipedia, the original wiki is Ward Cunningham’s Portland Pattern Repository, and the Meatball wiki is a favorite of mine. All of these wikis have information about using wikis! The word ‘wiki’ itself refers to a specific collection of wiki pages; the software that displays and allows editing of the pages is called a ‘wiki engine’. There are many wiki engines, but all need a Web server and a scripting langauge to run. The Web pages are generated on the fly from text files held in wiki format, or from records in a database on the php/mysql wiki engines.
A wiki is often defined as ‘a Web page with an edit button’, but I think that you need three more features to support the full power of a wiki;
- Automatic linking of pages
- Title search
- Free text search
Automatic linking: the Web page you edit can have links to other Web pages within the wiki, and these links to other pages are created by writing the link text in a special ‘pattern’, often a phrase of (at least) two words written together LikeThis. The link patterns are called WikiWords. You write a paragraph or two about an idea, and then make key words and phrases in the paragraph into links to new pages. You then go back and click on the links and write the text of the new pages.
Title search: when you click on the title of a page, you get a list of all the pages that contain the WikiWord that corresponds to the title of the page. If you have a large collection of wiki pages about (say) UbuntuDapper, you can index these pages by simply adding UbuntuDapper to each page. Follow the link from any page, and click on the title of the UbuntuDapper page, and you have a list of all your pages about UbuntuDapper. If you define wiki words like DoThis or ThisDone, you can use a wiki for rudimentary project planning.
Free text search: if you keep your information in fairly short Wiki pages, then finding something is easy with a free text search. If you find yourself using the same search phrase often, perhaps you need to create a title search for that phrase?
Wikis were designed to make collaboration easy, so why a private wiki? I use a wiki running on my desktop computer as a notebook for drafting out ideas, and for making rapid revisions to sets of pages. I also use my desktop wiki as a filing cabinet for odd scraps of information as all wiki engines feature a full text search. Finally, I hope to find a way of synchronising the desktop wiki with a password protected version on my Web space so that I can add and modify pages wherever I happen to have a pocket of time, and then have the changes reflected in the local version.
I use the venerable UseMod wiki as that is the script I’m using on my password protected Web server wiki, and because the script is a single perl file, and needs no resources other than the Apache Web server, a perl interpreter, and the diff program. The pages are stored in a directory, and each page file holds all previous versions of the page generated over a set time period. If you require the wiki pages to be displayed in standards compliant XHTML, then you might want to look at the OddMuse wiki script, a more recent fork of UseMod.
Local Web server
You can run the Apache Web server as a process on your desktop computer. There is a special address for the Web server http://localhost/. Apache looks for Web pages in /var/www and the perl scripts run from /usr/lib/cgi-bin. If you make a directory called public_html in your home directory, then the Web address or URL http://localhost/~username will reach any files you place in that directory.
Perl scripts need to have their permissions set to 755 to run as scripts. Directories that perl scripts need to save information to or need to create files in must have permissions set to 777. There are detailed instructions on all of this later on this page. You need to know the file system path of a file (e.g. /usr/lib/cgi-bin) and its corresponding URL (http://localhost/cgi-bin/wiki/wiki.pl). The mapping between file system path of a file and the URL is set in the Apache configuration file, and I am using the Xubuntu Dapper defaults.
Installing on Xubuntu
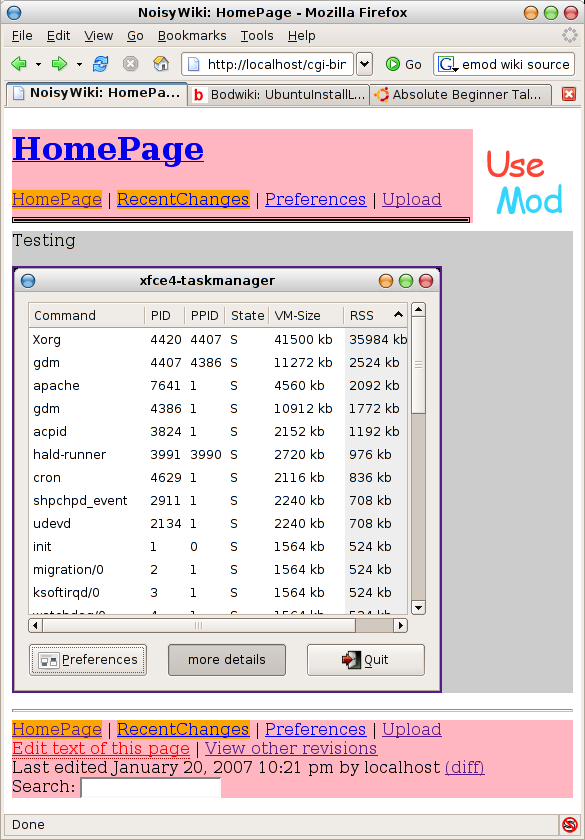
As UseMod is a perl based wiki script, I include instructions on how to install the Apache Web server on your computer. Once installed, Apache will start up at boot time and run as a background process. I’m using Apache 1.34 available in the Ubuntu Dapper repository as the extra features in Apache 2 are not needed. Once you have Apache running, you can edit the httpd.conf file to reduce the number of copies of Apache that are running -this is not a public Web server, and each instance uses 3Mb of RAM.
The next step is to download and extract the UseMod wiki script. Then you configure the wiki.pl script with the file system paths and URLs (Web addresses) of the resources it needs and set the correct permissions. The details in the rest of this page are for a default Dapper install.
I add a summary of the directories that you need to back up if you need to ensure that your wiki’s contents are never lost.
I use Xubuntu, so my desktop text editor is Mousepad. If you use Ubuntu, then simply use gedit wherever you see mousepad.
Install Apache
sudo apt-get install apache
Installs 1.3.4 which already knows how to run CGI scripts in
/usr/lib/cgi-bin
The html documents are at
/var/www
and you should see the ‘placeholder’ page by typing
http://localhost
in your Web browser
If you create a directory called public_html in your home drive (say /home/someuser), then you can see those files by typing
http://localhost/~someuser
in your Web browser
Edit httpd.conf to reduce machine load
Apache options are set in the file /etc/apache/httpd.conf. The default httpd.conf file launches 5 instances of Apache and adds more instances each time one is occupied. This is logical if you are running a live Web server, but for a local server, you can reduce the number of servers available. In Xubuntu, do
sudo mousepad /etc/apache/httpd.conf
then go to line 130, you should see something like
    # Server-pool size regulation.  Rather than making you guess how many
    # server processes you need, Apache dynamically adapts to the load it
    # sees --- that is, it tries to maintain enough server processes to
    # handle the current load, plus a few spare servers to handle transient
    # load spikes (e.g., multiple simultaneous requests from a single
    # Netscape browser).
    #
    # It does this by periodically checking how many servers are waiting
    # for a request.  If there are fewer than MinSpareServers, it creates
    # a new spare.  If there are more than MaxSpareServers, some of the
    # spares die off.  The default values are probably OK for most sites.
    #
    MinSpareServers 5
    MaxSpareServers 10
    #
    #
    # Number of servers to start initially --- should be a reasonable ballpark
    # figure.
    #
    StartServers 5
I change the variables as follows, you can’t specify less than one ‘spare server’ otherwise Apache generates errors and sets the variable to 1 spare server anyway.
    MinSpareServers 1
    MaxSpareServers 1
    #
    # Number of servers to start initially --- should be a reasonable ballpark
    # figure.
    #   StartServers 1
Then you can restart Apache using
sudo /etc/init.d/apache restart
and you should see one Apache process running
Downloading Usemod wiki script
There are many Wiki engines available, some using PERL scripts and others using PHP and the MySQL database. For legacy reasons I prefer to use the UseModWiki script. You might want to try the OddMuse wiki script (a fork of UseMod that produces XHTML and has very flexible formatting). The download addresses are…
To install UseMod, just unpack the tar file in your home directory. I just double-clicked on the tar file on the desktop, and archive manager popped the usemod10 directory into ~/Documents. The usemod10 that contains a number of files. You should put the wiki.css file in your public_html directory. Then make a directory called ‘images’ in your public_html directory and copy (or move) wiki.gif to that folder. You should be able to see the wiki.gif file by typing the address
http://localhost/~someuser/images/wiki.gif
into your Web browser (substitute your user name for ‘someuser’ in all that follows).
Configuring the wiki.pl script
First, we need to create a directory ‘wiki’ in the cgi-bin to hold wiki.pl and the flat file database that will hold the pages (I call mine ‘pages’). You also need to set execute permissions on the wiki directory and read/write permissions on the ‘pages’ directory. At a terminal, cd into the usemod10 directory and type the following as a series of separate commands (ie wait for each one to complete before typing the next)
    someuser@noisy:$ sudo mkdir /usr/lib/cgi-bin/wiki
    someuser@noisy:$ sudo mkdir /usr/lib/cgi-bin/wiki/pages
    someuser@noisy:$  sudo chmod 777 /usr/lib/cgi-bin/wiki/pages
    someuser@noisy:$ sudo chmod 755 /usr/lib/cgi-bin/wiki
Then you need to create a directory to hold uploaded files. I call mine ‘wikifiles’ and this directory is best placed in your public_html directory. This directory must have read/write permissions. The terminal commands are
    someuser@noisy:$ sudo mkdir ~/public_html/wikifiles
    someuser@noisy:$  sudo chmod 777 ~/public_html/wikifiles
where the ‘~’ symbol points to the home directory of the user issuing the command (i.e. /home/someuser in this example).
Switching back to the usemod10 directory, open wiki.pl in mousepad. We need to set various variables in the perl code. I like to have uploads enabled, and to give anyone the right to upload. I usually set an upload limit of 32 Mb just so I can upload large screen grabs and sound files. We also need to set the paths of various directories. You might want to switch line numbering on in mousepad or gedit. The configuration starts at line 67.
First you set the data directory for the wiki pages (line 68)
$DataDir = "/usr/lib/cgi-bin/wiki/pages";
Then you make sure that the external configuration file is disabled
$UseConfig = 0;
Then I set the site name and cookie name (line 73)
    $CookieName  = "NoisyWiki";
    $SiteName    = "NoisyWiki";
I rename the cookie as I synchronise this local wiki with one I keep on a Web server. If both have the same cookie name things might get interesting.
Then I set the URL for the wiki.gif logo (line 77)
$LogoUrl = "/~someuser/images/wiki.gif"; Notice that the / here relates to the Web server root, not the filing system root. You can think of the ‘/’ as short for http://localhost/. This kind of Web address is referred to as ‘local absolute’.
Because I use the wiki as a personal notebook, I want to keep revisions of pages for a longish time, say a year (line 82)
$KeepDays = 365;
Next you set the URL of the style sheet (line 88)
$StyleSheet = "/~someuser/wiki.css";
I like to upload small mp3 files and large photos, so I set the ‘upload’ limit to 32 Mb (line 94)
$MaxPost = 1024 * 1024 * 32;
Next we scroll down to line 112 and set the filesystem path and URL (Web address) for the wikifiles folder
    $UploadDir   = '/home/someuser/public_html/wikifiles';
    $UploadUrl   = 'http://localhost/~someuser/wikifiles';
In line 134, you set
$UseUpload = 1;
Then in line 171 you allow anyone to upload
$AllUpload = 1;
Save your changes to wiki.pl, copy the file to /usr/lib/cgi-bin/wiki and set the permissions using the following terminal commands
    someuser@noisy:~/Documents/usemod10$ sudo cp wiki.pl /usr/lib/cgi-bin/wiki/wiki.pl
    someuser@noisy:~/Documents/usemod10$ sudo chmod 755 /usr/lib/cgi-bin/wiki/wiki.pl
Go to http://localhost/cgi-bin/wiki/wiki.pl
and test the editing and uploading functions. Then you have a local wiki! I set the local wiki as my start page in Firefox.
Paths to backup
You need to backup
- ~/public_html
- /usr/lib/cgi-bin/wiki
and all the sub-directories. I’m experimenting with synchronising these directories to a password protected wiki on my Web server space. For now, I’m using Andrew Hunter’s upload.pl script to back up the pages and wikifiles directories to a directory outside the public folder of my Web space.
